I told you last night that I would show you today how I got the photo for the
pillow. Well here we go.
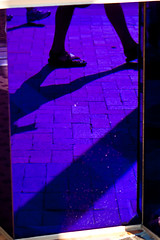
I started with this picture.
I ended up with this picture.
So how did I do it? With
NikSoftware Silver Efex Pro2 plug-in for
Photoshop CS4
. I first processed my RAW file. For more on how I do that you can click
here. I opened the jpg up in Photoshop.
Then I clicked on the Silver Efex plug-in. It's next to my history window.
This is what the Silver Efex work window looks like. It is very user friendly and I have to admit that I didn't use the program to it's full existent for this project.
On the left hand side is numerous presets. I scrolled down and picked the over exposed one for this.
This is the right hand panel. It's where you can fine tune how your picture looks. I only adjusted the toning for this picture.
There are 23 tones to choose from. I picked number 23 that's hiding behind my tool bar. Then I clicked OK and was taken back to Photoshop.
Then I cropped it to an 8x10. I did this because I only wanted a small photo to work up into a pillow.
For more information about all this plug-in can do please visit niksoftware.com.
My thoughts on the software:
I love it! It is a little over whelming at first. Between all the presets and all the ways you can tweak each preset you can start to get lost in it. The more I use it though the less overwhelming it is. I'm a big fan of black and white photography and this brings a more realistic black and white feel to your digital photos.
*Please note all opinions in this post are mine and mine along. I was in no way compensated for it. I have no affiliation with NikSoftware.


